Tuesday, November 26, 2013

Roasted Chicken Drumsticks


On the search for a easy dinner idea, I leafed through Food Network Magazine and I found this recipe. I did modify little bit by substituting mushrooms for leek and using coconut milk instead of half and half cream. It was soooo good. My hubby commented that the sauce tasted like Thai curry sauce. I think I can even use this sauce in other dishes. Oh the possibilities.  I added chill flakes to the sauce and it added a nice amount of heat to the sauce. 


  • 10 Drum sticks
  • 3 cloves of garlic
  • 1 cup of coconut milk
  • 1/4 cup of chicken broth
  • 3 tablespoon of flour 
  • Chili flakes (optional)
  • Salt & Pepper
  • Mushrooms/Leeks (Really any veggie you want to add)
  • Lemon
Heat the oven to 425F. 
Salt and pepper the drumsticks. Oil the skillet and brown the chicken on both sides until they are nicely browned, about 5 minutes. 
Place the chicken on a plate. Sautee the mushroom or any other vegetable on the skillet. Crush up the garlic and sautee as well. Make sure they don't burn. Place the chicken back into the skillet and pop them in the oven for about 20-30 minutes or until the thermometer reaches internal temp of 165F.

Once the chicken is cooked, transfer the chicken onto another plate. In the skillet, add coconut milk, chicken stock, chill flakes and flour and stir well until the sauce thickens to your liking. Taste the sauce and tinker with it to your liking. 

I would rate this 10 out of 10 on a simple dinner rating. It is pretty much a one skillet dish so clean up is a breeze. 


Tuesday, November 19, 2013

Mandu Kal Gooksu (Korean Dumpling noodle soup)

I don't cook Korean food a lot. Here's a little secret; my husband is a picky eater. I always tease him that he's got a palate of a five year old. He doesn't like onions, cabbage, peppers, mushrooms and etc... sort of the food that I didn't like when I was a kid either. But now I am an adult and I love all of those things mentioned above. Lot of Korean food contains the vegetables he doesn't like so I usually just end up catering to his preference.

In order for me to satisfy my husband and my craving for Korean food, I make my own dumpling at home. Most of the store bought ones have too much MSG and they also have onions or green onions which my husband dislikes. I have been trying to avoid MSG by making lot of the food at home. This can be a pain but I feel good that I know what I am feeding my child.
Anyway, back to the dumplings. I usually make a big batch of dumplings and with 3 lbs. of ground pork, by the time I am done, I have about 200 pork dumplings for future use.
Fortunately for my husband, he does appreciate me for making them at home. If he wasn't grateful he wouldn't get fed so I guess he's a smart guy.

One of our favourite dish to eat is Mandu Kal Gooksu, which is dumpling soup with noodles. Since I bought my Kitchenaid Pasta attachment, we have been making it lot more often. The noodles used in the soup are little thicker so I have been using the linguini attachment to make the noodles. You can make the noodles by hand, which I have done before purchasing the pasta maker but rolling it to the thickness you want can get tiresome.

I make a base stock with anchovies and dried seaweed. Now, these anchovies aren't the usual anchovies you buy in the store. They are dried up fish that are simmered to make stock.
I use that for the soup base and add my dumplings and the noodle. The soup itself is very simple to make as long as you have the necessary ingredients which in this case are, the dumplings and the noodles.
3. Mandu skin

2. Making the mandu skin

1. Rolling the dough

6. Final product

5. Filling for mandu

4.Putting the filling inside the skin


Noodle for the soup.


Monday, November 18, 2013

Kitchen Aid Attachment

Lately, I have been obsessed with the idea of making homemade pasta.

One of my neighbours with a Marcato Atlas pasta maker generously offered to lend it to me so I could try out making pasta with it.  I looked up recipes for a handmade pasta and came across David Lobovitz's site.

I liked making the pasta so much that I decided to purchase one. I wasn't sure whether I wanted a hand crank style or Kitchenaid attachment since I have a Kitchenaid mixer at home. I did my homework and here's my two cents on the two different types of pasta maker.

            Hand crank.                                          

  • It's more affordable with the prices starting around $20.00(Amazon.com) all the way to $200.00 for pasta maker with a motor. 
  • It is portable since you don't need a mixer to make it work. 
  • It is hand cranked so you need to turn the crank while feeding the machine with the dough and trying to catch the noodle as it comes out on the other side. 
  • There are other attachment available for purchase depending on the machine (i.e. ravioli maker). 
            Kitchenaid Attachment
  • It is more pricey than hand cranked pasta maker. Attatchment with roller, spaghetti and fettucini ranges in price from $150.00-$200.00 depending on where you purchase. 
  • The motor in the mixer does all the work for you, thus leaving your hands free to feed the dough and catch the noodle as it goes through the attachment.
  • Easier to store the attachments since they take less room than a bulky pasta maker. 
  • Additional attachment are available for purchase.
After reading the reviews and having had an opportunity to try out the Atlas pasta maker, we decided to purchase Kitchenaid pasta attachment. We got a 20 %off coupon at Bed,bath and beyond and used that towards the purchase. It actually ended up being cheaper than buying off Amazon. 

I will post more pictures of the 3 attachments I have in the next few days. 

I really look forward to making fresh pasta with the attachment and can't believe how easy it is. I still have my boxes of store bought pasta at home for those times when I need to quickly make a meal but I try to make fresh pasta as much as I can. Fresh pasta is chewier and just tastes better. Period. 

Roller Attachment
Spaghetti Attachment

Drying process


Monday, March 11, 2013


Lodge vs. Le Creuset Skillet

I had my eyes set on Le Creuset skillet for awhile now. I've got their Braiser and I like using it to cook stews and curries. I have to say they are pretty expensive; especially here in Canada where just about anything costs more than U.S.

One day, I decided that I needed a skillet. We didn't have our grill with us and I wanted to cook up some steak and burgers.
Instead of buying a Le Creuset, I decided on a Lodge skillet. It came in a 12" size and it cost about $130.00 less than Le Creuset. I really like the look of Le Creuset and it is enamel coasted so there is no seasoning required but I didn't want to spend so much on a skillet at this time.

Lodge is a heavy duty skillet. I've read that you can even use it in camp fire. It's American made which is nice and a 12" skillet cost me under $20.00 on Amazon. It doesn't look sleek or as pretty as Le Creuset since it is not coated with colour.

With the Lodge, you have to season it periodically. Some of them come pre-seasoned but from my personal experience, it is better to season before you start using it.  You don't' have to do it every time you use it but it does need to be done. Seasoning isn't hard but it is time consuming. If you don't want to bother with seasoning, I would highly recommend a Le Creuset.

Overall, I am pretty satisfied with Lodge. For its price, it is worth getting one if you do need one.
I may cave in buy a Le Creuset at a later day if I need another skillet but for now, Lodge is serving its purpose quite nicely.

Tuesday, March 5, 2013

C's Make and Eat


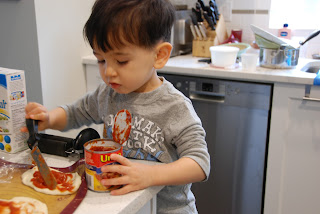
I can never get him to properly smile into the camera. But he still looks so Adorable! There is his pizza he made all by himself.

When C. woke up, he asked for pizza for lunch. And I said YES! I am really into homemade pizza not because it's more economical but because it's a fun cooking experience for me and him. We usually make the dough together and it gives him a chance to help me with scooping out flour and measuring.
I really like the idea of being able to customize the toppings and know what I am putting into it.

I think that's what matters to me the most; I know what goes into the food.

Back to the pizza, this post is more about the experiences we shared rather than on the pizza recipe. I have the recipe to the pizza dough here.


There are so many learning components to it; there is counting, reading and also just being able to follow simple steps to making a pizza. There is also a social learning aspect to this as well. He is learning to wait and take turns.

Need an idea for a rainy day? Let this be your next rainy day activity. It's delicious and so simple (be warned, it may get little messy).

Bon Appetit!

Quesadilla

I've been really getting into Mexican food. I am sure I am not getting the essence of Mexican cuisine with my taco and fajita nights at home but I find them to be pretty quick and easy meals to prepare at home. I've always enjoyed eating Quesadilla at restaurants so I thought to myself "why not try this at home?". The concept seemed pretty simple. Flour tortilla with cheese in the middle; sorta like Grilled cheese but with tortillas. (I really hope I am not offending anybody with this remark. If I am, I apologize.) I grilled some onions and spinach in a separate pan with my mix of cajun seasoning. Then in another pan, I put a tortilla down, put blended cheese of Monterey and Cheddar in the middle and spread the onion and spinach on top and covered it with another tortilla. Flip it after few minutes and make sure both sides are nicely browned. Serve with a side of guacamole, sour cream and salsa. The key here is to make sure the pan has enough butter or oil on it so that the tortilla doesn't stick to the pan. Otherwise, flipping it would be extremely hard and you may end up with a hold in the tortilla. And the beauty of this dish is that you can pretty much customize however you want it. You can add meat, mushrooms, olives and etc. I am going to attempt to make my own tortilla and see how that goes. I am not sure if it would be worth it to make my own but heck, why not. Right? Bon Appetit!

Spring Rolls

I am Back!!! My life has changed so much in the last year. We've moved from our bustling Downtown dwelling to a suburban neighbourhood. We are still adjusting but it's been okay. I have been so spoiled living in downtown that the idea of having to drive almost anywhere here is annoying but I do love the neighbourhood. And now that we are settled in, I can start to get back to cooking and baking. Couple weeks back, we went to a Thai restaurant out in the burbs and the food was pretty good. We had spring rolls and when I was out grocery shopping, I bought a spring roll wrapper on impulse.


I've made man-du (Korean dumpling) before at home so I figure making spring rolls is along the same idea. I like meat in my spring roll so I seasoned some ground pork with salt and pepper, cut up some cabbage and bamboo shoots. I started to cook the meat and I made some gravy with corn starch and water and mixed that in . Now depending on the size of the spring roll wrapper, you can adjust the size. The original size was too big so I cut into quarters to they were more bite sized rolls.


Scoop some meat up, put it in the middle of the wrapper and roll up one side and tuck the sides in and keep rolling until it looks like a spring roll. This make take some time and practice before you perfect it but hey who cares if it isn't perfect. Pour vegetable oil into the pot and get it up to 350 degrees. Don't crowd the pot with too many rolls as it can bring down the temp of the oil. Fry it until they are golden brown and take them out. Dip them into a sweet chilli sauce or plum sauce and enjoy! These would make great party food as an appetizer or a potluck dish.